What do you do when you're working in Claude Code and feel like, "I want to take a quick look at or fix this file"?
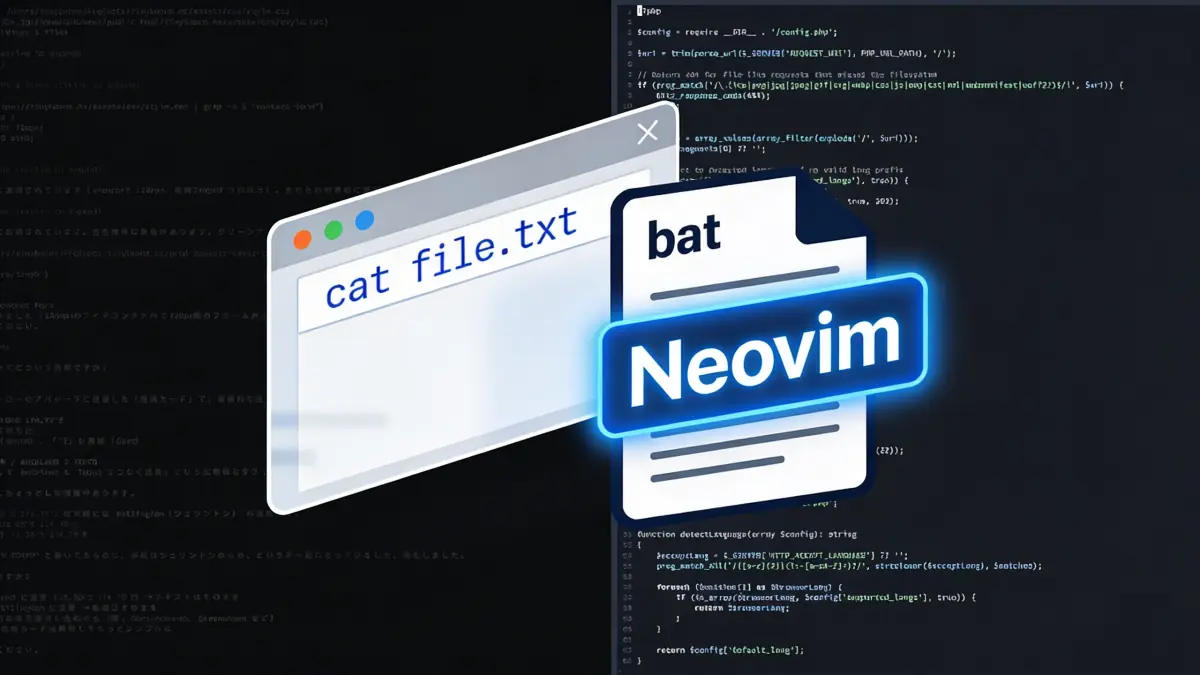
Table of Contents
When working with Claude Code, there are many situations where you think, "I just want to check the contents of this file." You can quickly peek with cat or less, but sometimes you want to read it properly with syntax highlighting.
While you could just open VS Code or Cursor, having IDEs open for multiple projects can gradually eat up your memory. Have you ever felt that "it's too heavy to launch an IDE just to look at a file"?
In this article, I will introduce two solutions that stay entirely within the terminal.
batif you just want to view: An enhanced version ofcat. It features syntax highlighting, and mouse selection works naturally.- Neovim if you might want to edit: A lightweight editor that opens files with syntax highlighting and allows for quick fixes if needed.
By the way, the terminal I use is Ghostty. It's lightweight and makes it easy to split the screen, which I find very useful. It's very comfortable to run Claude Code in one pane while using bat or Neovim in the other to check files.
The Simplest Options: cat / less / tail
Before diving into bat, let's mention the standard commands. If you don't need syntax highlighting and just want to see the content, these are sufficient.
# Display the entire file as is
cat src/index.ts

# When you want to read while scrolling
less src/index.ts

# When you only want to check the end of the file
tail -20 src/index.ts
In less, use the space bar to scroll down one screen and q to quit. You can search by typing / followed by a keyword.
However, these commands lack syntax highlighting. When it comes to reading code, the lack of color can be surprisingly taxing.
The Definitive Choice for Viewing: bat
bat is a cat clone that comes with syntax highlighting and paging (equivalent to less) out of the box. It's a leading example of modern CLI tools written in Rust and is widely used as a standard replacement for cat.
Installation is a breeze with Homebrew.
brew install bat
Usage is almost the same as cat.
bat src/index.ts
If the file is long, it automatically enters paging mode; like less, use the space bar to scroll and q to quit. For short files, it outputs directly without a pager like cat, making it a superior alternative.
How Mouse Operation Works
bat (which uses less internally) does not capture mouse events. Therefore, the terminal handles mouse selection normally. Drag-to-select → Command+C works as expected. You don't need to memorize modifier keys like in Neovim, which I'll introduce later.
Scrolling with the mouse wheel also works comfortably in Ghostty without any additional configuration, as it scrolls the currently displayed page.
Using it Regularly as a Replacement for cat
If you want to use bat with the feel of cat, it's common to set an alias.
alias cat='bat --plain --paging=never'
--plain is an option to omit decorations (line numbers and grids), and --paging=never ensures it outputs directly even for short files. This allows you to use it like cat while benefiting from syntax highlighting.
However, I don't set an alias myself. This is because I want to keep the behavior consistent with when I use cat in shell scripts, and typing bat intentionally when I want syntax highlighting makes my purpose clearer to myself.
Neovim if You Might Want to Edit
bat is a tool dedicated to viewing. When you think, "I want to make a quick fix after reading," it's time for an editor. From here, I'll introduce the steps to set up Neovim. It's okay even if you've never touched a Vim-style editor.
Why Neovim Instead of Vim?
When you think of editors that run in the terminal, Vim comes to mind, but in this article, we will use Neovim. Neovim is a fork of Vim, and basic operations are the same. The main difference is the extent to which it is usable out of the box without configuration.
To do the same thing in vanilla Vim, there are several "must-have" settings you'd need to write first, such as enabling syntax highlighting, configuring autoread, displaying line numbers, and fixing backspace behavior. Neovim has these enabled by default, so you can reach your desired environment with minimal configuration.
If you are a heavy Vim user, you can create the same environment by writing the same settings in your .vimrc. However, since I'm not that well-versed in Vim myself, Neovim—which is practical even with default settings—was easier. If you're starting now, I think Neovim is more approachable.
Installing and Launching Neovim
On macOS, it's one command with Homebrew.
brew install neovim
For Ubuntu-based systems:
sudo apt install neovim
Let's verify the installation.
nvim --version
To open a file, launch it with nvim filename.
nvim src/index.ts
Understanding the Concept of "Modes"
When you first touch Neovim, you might be bewildered because typing keys doesn't input characters. This is because Neovim has a system called "modes." Immediately after startup, it is in Normal Mode, where all key inputs are interpreted as "operation commands."
There are only three modes you need to remember.
| Key | Mode | Purpose |
|---|---|---|
| (At startup) | Normal Mode | Cursor movement, command execution |
i | Insert Mode | Inputting and editing text |
v / V | Visual Mode | Range selection (v for character-wise, V for line-wise) |
You can return to Normal Mode from any mode by pressing Esc. If you get lost, just press Esc twice, and you won't stay lost. The status line at the bottom of the screen displays -- INSERT -- or -- VISUAL --, so you can tell at a glance which mode you are in.
Saving and Quitting
Typing : in Normal Mode brings up the command input field. Remember at least these.
| Command | Action |
|---|---|
:w | Save |
:q | Quit |
:wq | Save and quit |
:q! | Force quit without saving |
The "I don't know how to close it" situation is a classic Vim trope, but as long as you know :q!, you can escape.
Setting Up Auto-Reload for Claude Code Edits
You might keep a file open in Neovim while letting Claude Code work in an adjacent pane. It's convenient to set it up so that it automatically reloads the file when Claude Code overwrites it.
The configuration file is ~/.config/nvim/init.vim. If it doesn't exist yet, create it along with the directory.
mkdir -p ~/.config/nvim
nvim ~/.config/nvim/init.vim
Write the following content:
set autoread
set number
syntax on
au CursorHold,CursorHoldI * checktime
au FocusGained,BufEnter * checktime
autoread is enabled by default in Neovim, but I've included it here to make the intention explicit. However, autoread alone only triggers a reload at limited times, such as after executing a shell command or when focus returns. By adding the two au (autocmd) lines, checktime (checking for external changes) will be executed when the cursor stays still for a certain period or when focus returns to the window.
With this setting, if you keep a file open in Neovim, you can watch the content update in real-time as Claude Code edits it in the adjacent pane.
The Style of Copy & Paste
If you want to edit in Neovim, you need to understand its copy-and-paste mechanism. Unique terminology is used in the world of Vim.
- Copying is called yanking.
- There is no concept of cutting; when you delete, the content is automatically placed in a register.
In other words, "Delete = Cut." This shift in thinking might be the first hurdle.
Basic Operations (Normal Mode)
| Key | Action |
|---|---|
yy | Copy current line |
dd | Cut current line (delete and put in register) |
x | Delete one character |
p | Paste after the cursor |
P | Paste before the cursor |
Pressing y in Visual Mode (after selecting a range with v) copies the selection, and pressing d cuts the selection.
Integrating with the Mac Clipboard
By default, y and p only work with Neovim's internal registers. If you want to exchange copy-and-paste data with other Mac apps, add one line to init.vim.
set clipboard=unnamedplus
Now y / p / d are all directly linked to the Mac system clipboard. You can paste content yanked in Neovim into another app using Command+V, or conversely, paste content copied in another app into Neovim using p.
If you want to use the clipboard integration only when needed rather than always, you can specify it individually by typing "+y (yank to system clipboard) or "+p (paste from system clipboard).
Choosing Mouse Operations
Neovim has mouse operations enabled by default (the mouse=nvi setting). In this state, dragging the mouse is treated as a Visual Mode selection in Neovim rather than a terminal selection.
If you press Command+C here, nothing will be copied because no selection exists on the terminal side. Furthermore, if you accidentally press the c key, Neovim interprets it as "change" (delete selection and enter Insert Mode), which could lead to the selection disappearing.
In the beginning, I couldn't break the habit of "Select with mouse → Command+C" and accidentally deleted my selection several times. But don't worry, you'll get used to it quickly. Even if you mess up, you can return to Normal Mode with Esc and press u to undo (u is undo, Ctrl+r is redo. Think of it as the equivalent of Command+Z / Command+Shift+Z on Mac).
There are three approaches to handling this.
Recommended: Use as Default
Actually, it's easiest to leave the mouse setting as mouse=nvi and rely on the Vim style (y / d / p) for copy and paste. This is the method I settled on.
- Drag with the mouse for Visual selection → Just pressing
yputs it in the Mac clipboard (thanks toclipboard=unnamedplus). - Since you can place the cursor with a mouse click, it feels like a normal editor even while editing.
You just replace the "Select with mouse → Command+C" habit with "Select with mouse → y." Since you only need to remember three keys—y, d, and p—this is faster once you get used to it.
If You Absolutely Want to Use Command+C: Modifier Key + Drag
If you don't want to switch to keyboard operations and want to stick with Command+C, dragging while holding a modifier key will perform a terminal-side selection, allowing you to copy with Command+C.
The modifier key varies depending on the terminal app.
| Terminal | How to bypass mouse reporting |
|---|---|
| Ghostty | Shift + Drag |
| iTerm2 | Shift + Drag (Option + Drag for rectangular selection) |
| Terminal.app | fn + Drag or Shift + Drag (Option + Drag for rectangular selection) |
If You Want to Turn Off Mouse Operations Entirely: set mouse=
set mouse=
All mouse operations will fall under the terminal's jurisdiction, so Command+C after dragging to select will work normally. However, you won't be able to place the cursor with a mouse click, which makes editing slightly less convenient.
Summary of How to Paste from Mac Clipboard to Neovim
You can use different methods depending on the situation.
| Situation | Method |
|---|---|
clipboard=unnamedplus configured | p in Normal Mode |
| No configuration | "+p in Normal Mode |
| While in Insert Mode | Command+V (via terminal's paste function) |
Final init.vim
Combining all the settings so far, it looks like this:
set mouse=nvi
set clipboard=unnamedplus
set number
syntax on
set autoread
au CursorHold,CursorHoldI * checktime
au FocusGained,BufEnter * checktime
It's only seven lines, but it achieves the following:
- Cursor placement via mouse click.
- Mouse drag selection → Copy to Mac clipboard with
y. y/p/ddirectly linked to the Mac clipboard.Command+Vusable in Insert Mode.- External changes by Claude Code are automatically reloaded.
Conclusion
My conclusion is simple: bat if you just want to view, Neovim if you might want to edit. bat becomes an immediate asset just by installing it, and for Neovim, adding just two lines—set clipboard=unnamedplus and set autoread—gives you a lightweight environment where you can read with syntax highlighting and make quick fixes.
Neovim can be confusing at first with the concept of "modes" and the style of copy-and-paste, but once you get used to the idea that yanking (y) and deleting (d) are directly clipboard operations, there's a satisfying feeling of completing work without ever taking your hands off the terminal.
When it's not worth launching an IDE but cat is hard to read without syntax highlighting, using bat and Neovim appropriately makes working with Claude Code much more comfortable. Please give it a try.